Right, here it is – the sourdough recipe I’ve spent actual months getting right. I’m not saying I’m Paul Hollywood, but I am saying this makes two boss loaves of bread that look impressive and taste unreal. Everyone’s kitchen, climate, temperature their working in and flour is different so this recipe is not really that close to the original one I started with from a lady in California, but I find this one works for me here, in Liverpool.
And listen, I know sourdough sounds like effort – but once you’ve had a couple of goes, it becomes second nature. It’s actually pretty low maintenance and costs about 73p in flour, a bit of salt and water for two gorgeous artisanal loaves. That’s it.
No mystical family story, no great-grandmother trekking the Himalayas for the perfect starter. Just a solid recipe that works in a normal kitchen with normal ingredients. I use Lidl flour. Let’s go.
Ingredients (for 2 loaves):
-
800g strong white bread flour
-
200g strong wholemeal bread flour
-
650ml water, plus another 50ml
-
250g active sourdough starter (big, bubbly and doubled in size – usually 8 hours after feeding)
-
20g salt
-
Rice flour (not optional. Use this to dust the bannetons or prepare for tears)
Instructions:
-
Mix the dough
Mix your flours, 650ml water, and starter in a big bowl. Don’t add the salt yet. Just mix until there’s no dry flour, cover it and leave it for an hour. This gives the flour time to absorb the water and start developing structure (if you’re fancy, this is called the autolyse stage). -
Add the salt
Dissolve your 20g of salt in the remaining 50ml of water and mix that in. It’ll feel like a soggy mess, that’s fine. -
Knead it like it owes you money
Now you get stuck in. Knead the dough for a full 10 minutes. Lift it, slap it down on the counter, repeat. You’ll hear a lot about “stretch and folds” in other recipes, but I’ve found a proper knead at the start gives your bread the best structure. Think of it like dough therapy. Take your rage out here. -
Bulk fermentation (first rise)
Cover it and let it do its thing. Every couple of hours, check on it and do a few sets of stretch and folds – that just means pulling the dough up on one side and folding it over itself, then turning the bowl and repeating a few times. It builds strength without knocking the air out. Show it some love. -
Ready when doubled
Once it’s doubled in size and full of bubbles, and pulls away cleanly from the bowl, tip it onto the counter and divide it into two equal halves. -
Pre-shape and rest
Shape each half into a rough ball by pushing the dough forward and folding the dough under itself as you pull it back towards you. This creates surface tension so it holds its shape better. If your dough is sticky, this bit is especially important – surface tension is your friend. Let them rest for 10 minutes under a tea towel. -
Final shape and proof
Stretch each ball into a rectangle, fold the sides in, roll it up tightly and pinch the ends. Dust two bannetons generously with rice flour – trust me, normal flour will get absorbed and your loaves will stick. Don’t put yourself through that trauma.
Pop the dough in, cover with plastic and rest in the fridge overnight. -
Bake
The next morning, preheat your oven to 260°C with your Dutch oven (or casserole dish) inside.
When ready, tip the dough out, score the top with a sharp knife or razor, and bake with the lid on for 20 minutes. (Optional: take it out after 10 mins and rescore for that dramatic sourdough ‘burst’ look).
Then, remove the lid, reduce oven to 220°C, and bake for another 15–20 minutes depending how brown you like it. -
Cool before slicing
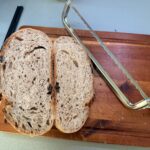
I know, it’s hard, but if you cut into it too soon, the inside will go gummy. Let it cool fully and then slice in.
That’s it. It sounds like a lot but once you’ve done it a couple of times, it honestly becomes part of your routine.
And honestly, what’s more smug than making your own sourdough for about 70p a loaf?
You’ve got this x